3D Printed Rabbit Runs
I recently designed and built a rabbit run using my 3D printers and OnShape - three iterations later and the results are great, join me on the design journey.


I'm always looking for a fun engineering challenge, and I was recently presented with a particularly interesting one: how do we allow rabbits to safely move from their hutch to a portable outdoor enclosure in a way that is flexible, extensible, and cost effective?
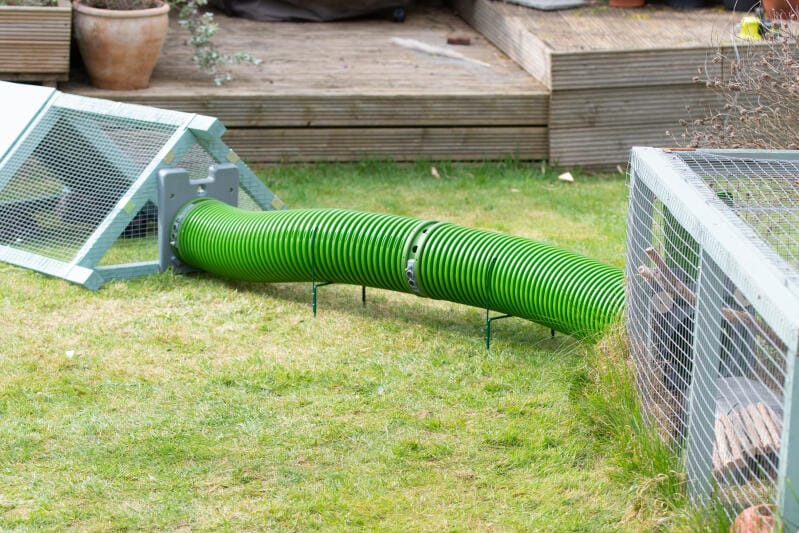
Doing some searching online, you might come across something like Omlet's Zippi tunnel system which gives you about 1.8m worth of tunnel for the bargain basement price of €150. Personally, spending almost €10/cm seems like an absolute bargain if you're in the business of selling gold extracted from one of your many gold mines - but I'm a rather less financially successful than that... besides, I rather enjoy solving problems myself.
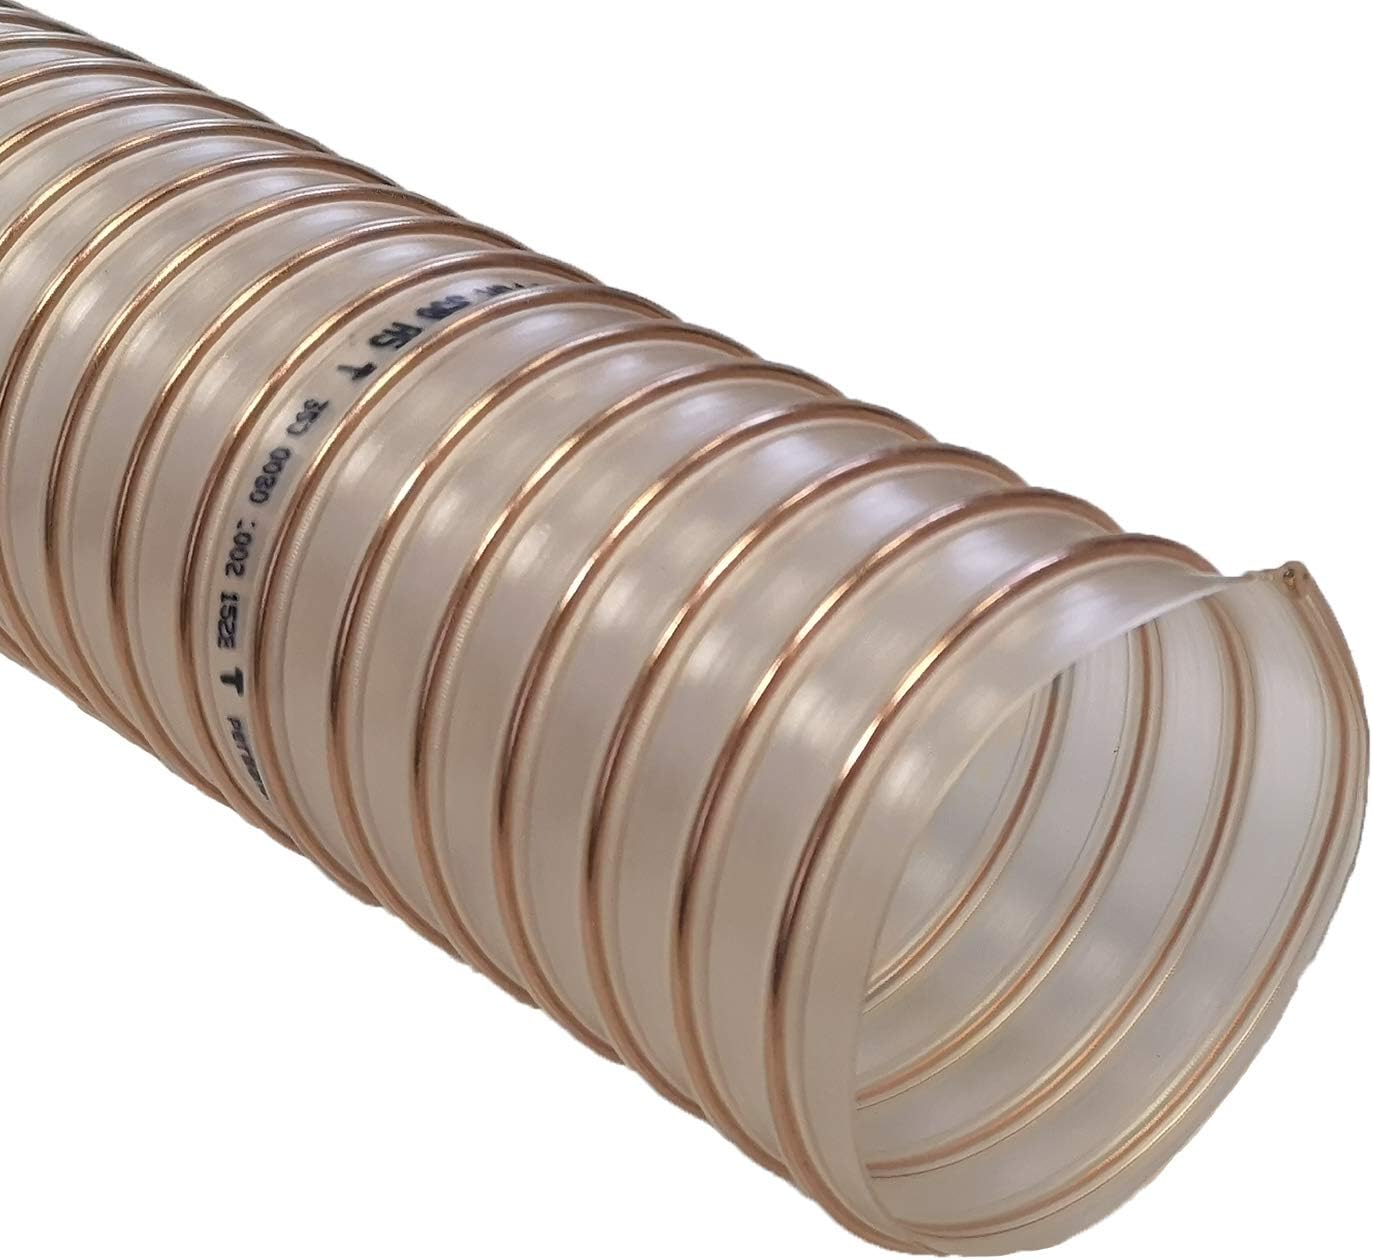
Instead, we can pick up 6 meters of PU dust extraction hose for about the same money (when you include shipping and customs fees). Rabbits are basically just semi-sentient abbrasive materials, so if the PU piping can handle wood chippings then it should be able to handle rabbits too. The downside is that said ducting doesn't come with any way to attach it to the rest of the rabbit's accoutrements...
Which is the point where I opened up OnShape and started modelling. My goal was to build something which could be easily attached/detached, was secure enough that the rabbits wouldn't be able to detach it, and which could be easily 3D printed.
Version 1
My initial thought was that I could design end-caps for the pipe which would then use magnets to affix to a door-plate - with the strength of the magnets providing longitudinal retention and a small relief in the door frame providing lateral stability.
This approach was lovely from a printability perspective since there were no significant overhangs to comtend with and I could take advantage of low density infills to build bulky parts with minimal cost (unlike injection moulding).
The problem I found, however, was that any force moment applied to the mounting would quickly de-couple it (making this easy for the rabbits to disconnect, nevermind a fox).
Version 2
For the second version of the design, I opted for a locking-lug configuration which would act to secure the two parts together - providing both longitudinal and lateral stability, with rotational retention provided by magnets which would engage when the lugs were in the secure position.
To simplify design of the various components, I opted to model the two connector components and then import them into larger component sketches. This allowed me to minimize the amount of repeated modelling work and also permitted rapid prototyping of the connectors by removing the need to print larger components along the way.
One of the particularly interesting ideas I added in v2 was the ability to join pipe segments together. 6 meters is a lot of pipe to move around, and there are many scenarios where you need a lot less than that. My goal was to enable the pipe to be cut into 3x 2m sections and then re-joined using a coupling connector as required.
The problem with this idea, for anyone familiar with 3D printing, is that the locking lug design meant that printing them back-to-back would result in overhangs. Instead, I opted to design the coupling connector a set of mirrored components which would be screwed together back-to-back, addressing this concern.

This design was functional, but when I assembled the first prototype I found a few issues which hindered its usability.
- The coupling connectors required heat-set inserts to be installed on the underside, and this resulted in sub-optimal sealing between their bottom faces.
- The magnets on the pipe connectors adhered to the screws, creating a weird experience when connecting (you had to fight the magnets to twice).
- Inserting the magnets under the lugs was challenging, especially when I reduced the hole diameter to improve retention.
- Three locking lugs worked well in smaller scale prototypes, but didn't appear to scale nicely as the pipe diameter increased.
- The way I modelled the locking lugs involved using a binary union operation and it required a lot of manual face selection, making it impossible to automatically configure the number of lugs.
- There were cases where we may wish to secure parts together and prevent them from being decoupled (i.e. we needed an actual locking system).
- It used a lot of magnets, especially if I was going to use 5x lugs.
Which ultimately meant it was time to go back to the drawing board for a v3.
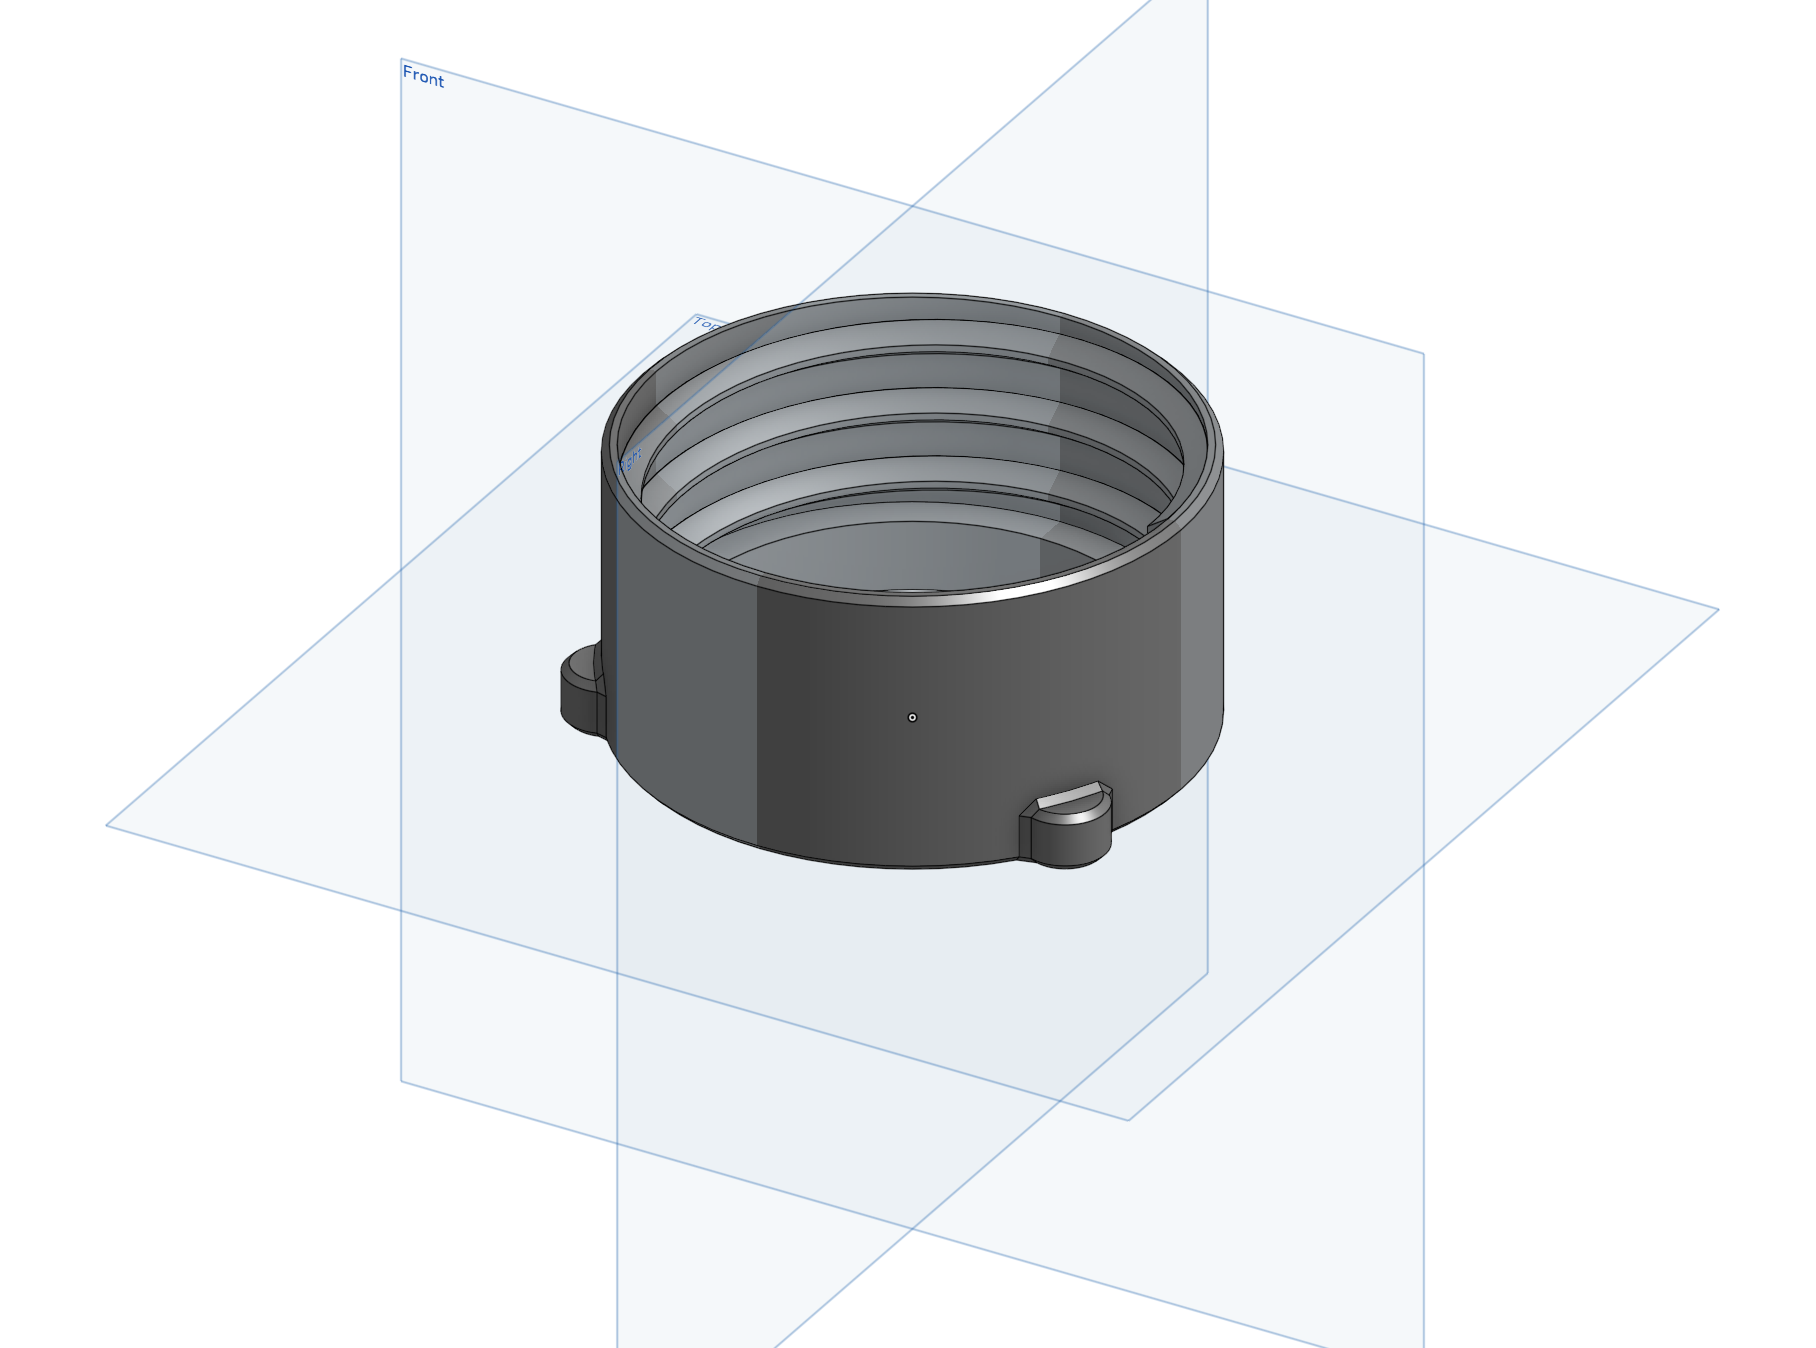
Version 3
Taking everything I had learnt from the v2 approach, I completely re-modelled v3 from the ground up with the goal of making it substantially easier to vary the number of locking lugs, simplify the assembly, use fewer magnets, and remove the need for the heatset inserts.
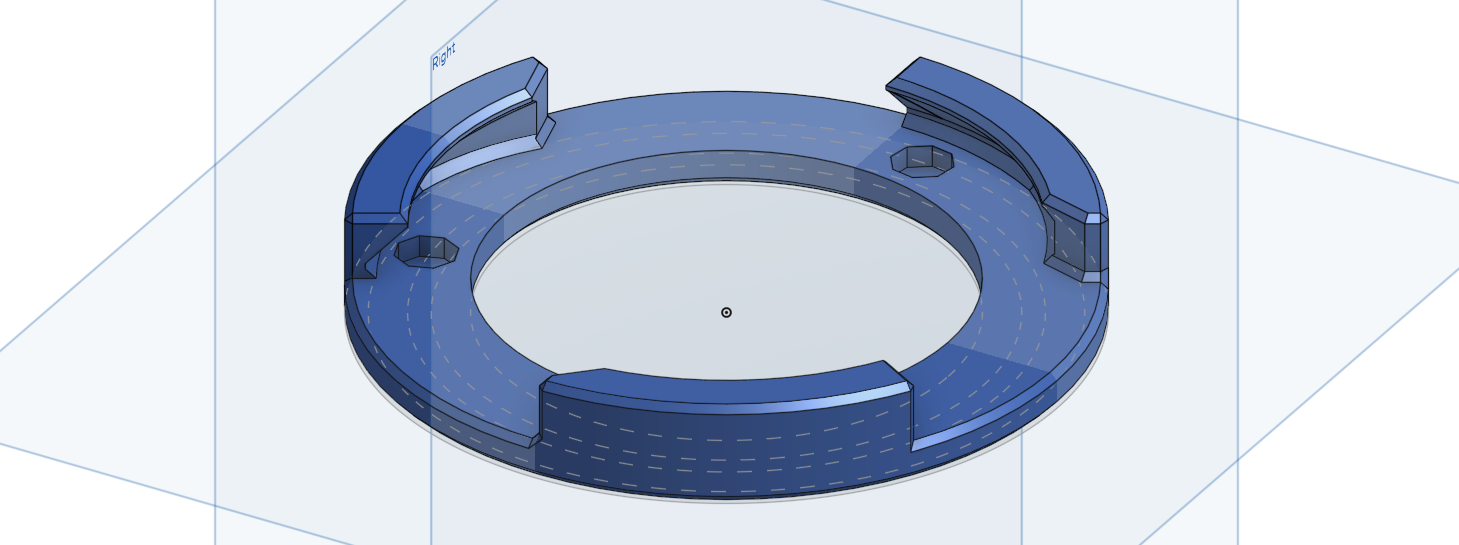
The key to simplifying the configurability of the locking lugs was switching away from eagerly repeating features in the sketches and instead only repeating features in their final form.

This involved modelling one instance of feature as shown below for the same mounting component (I've disabled the final pattern repetetion to highlight this property).

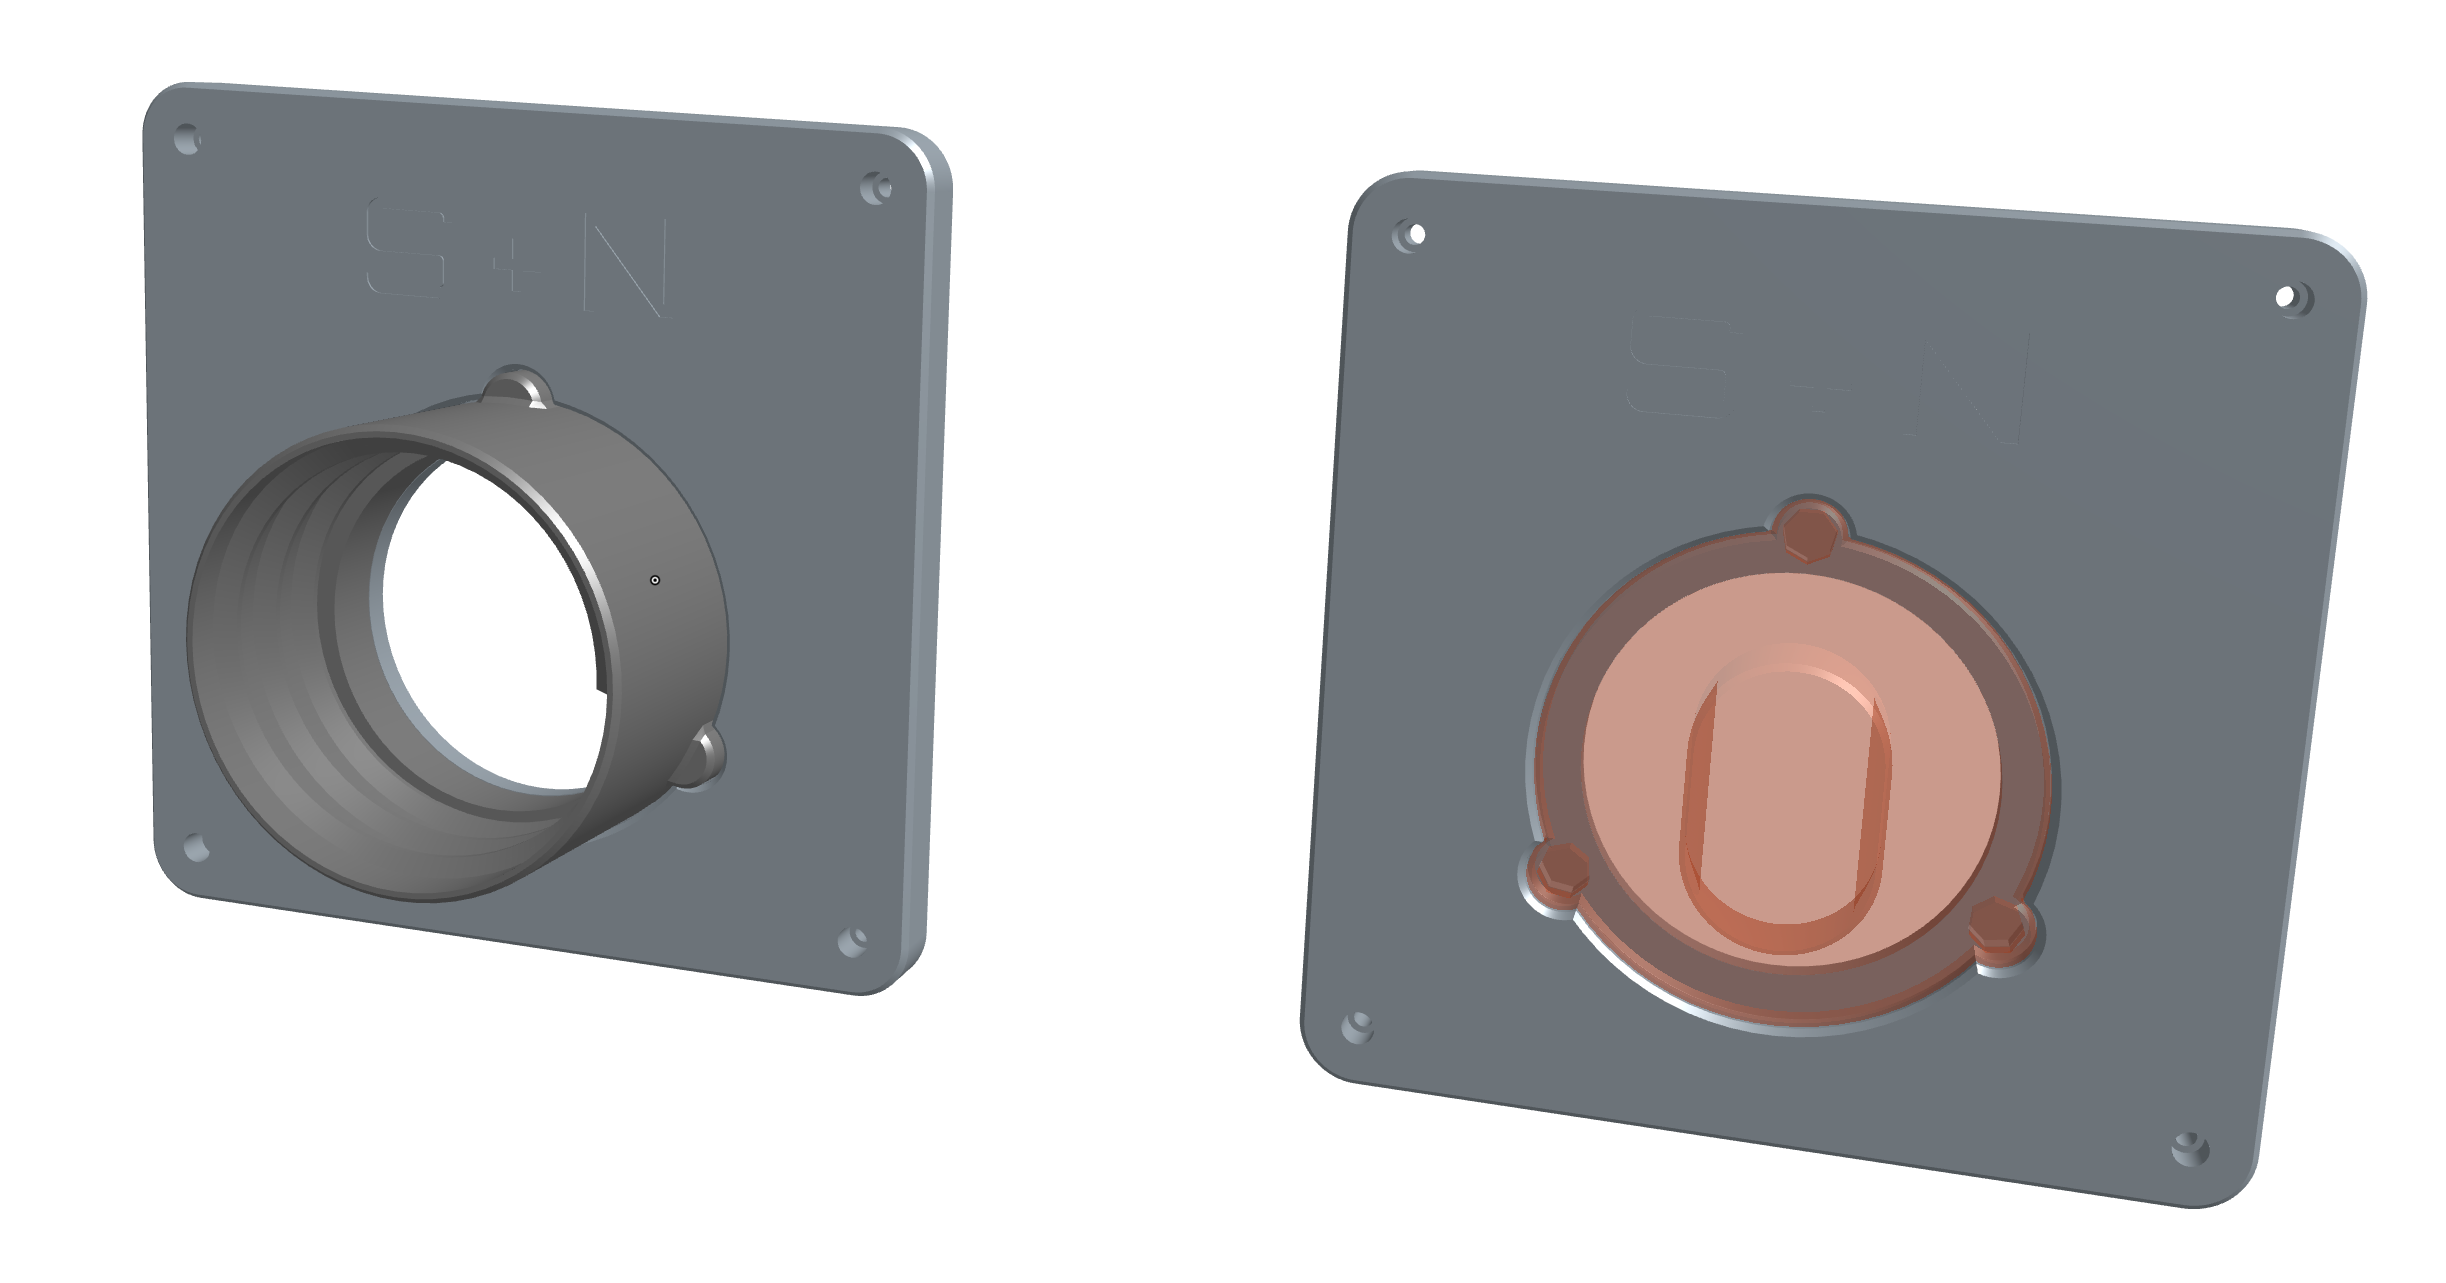
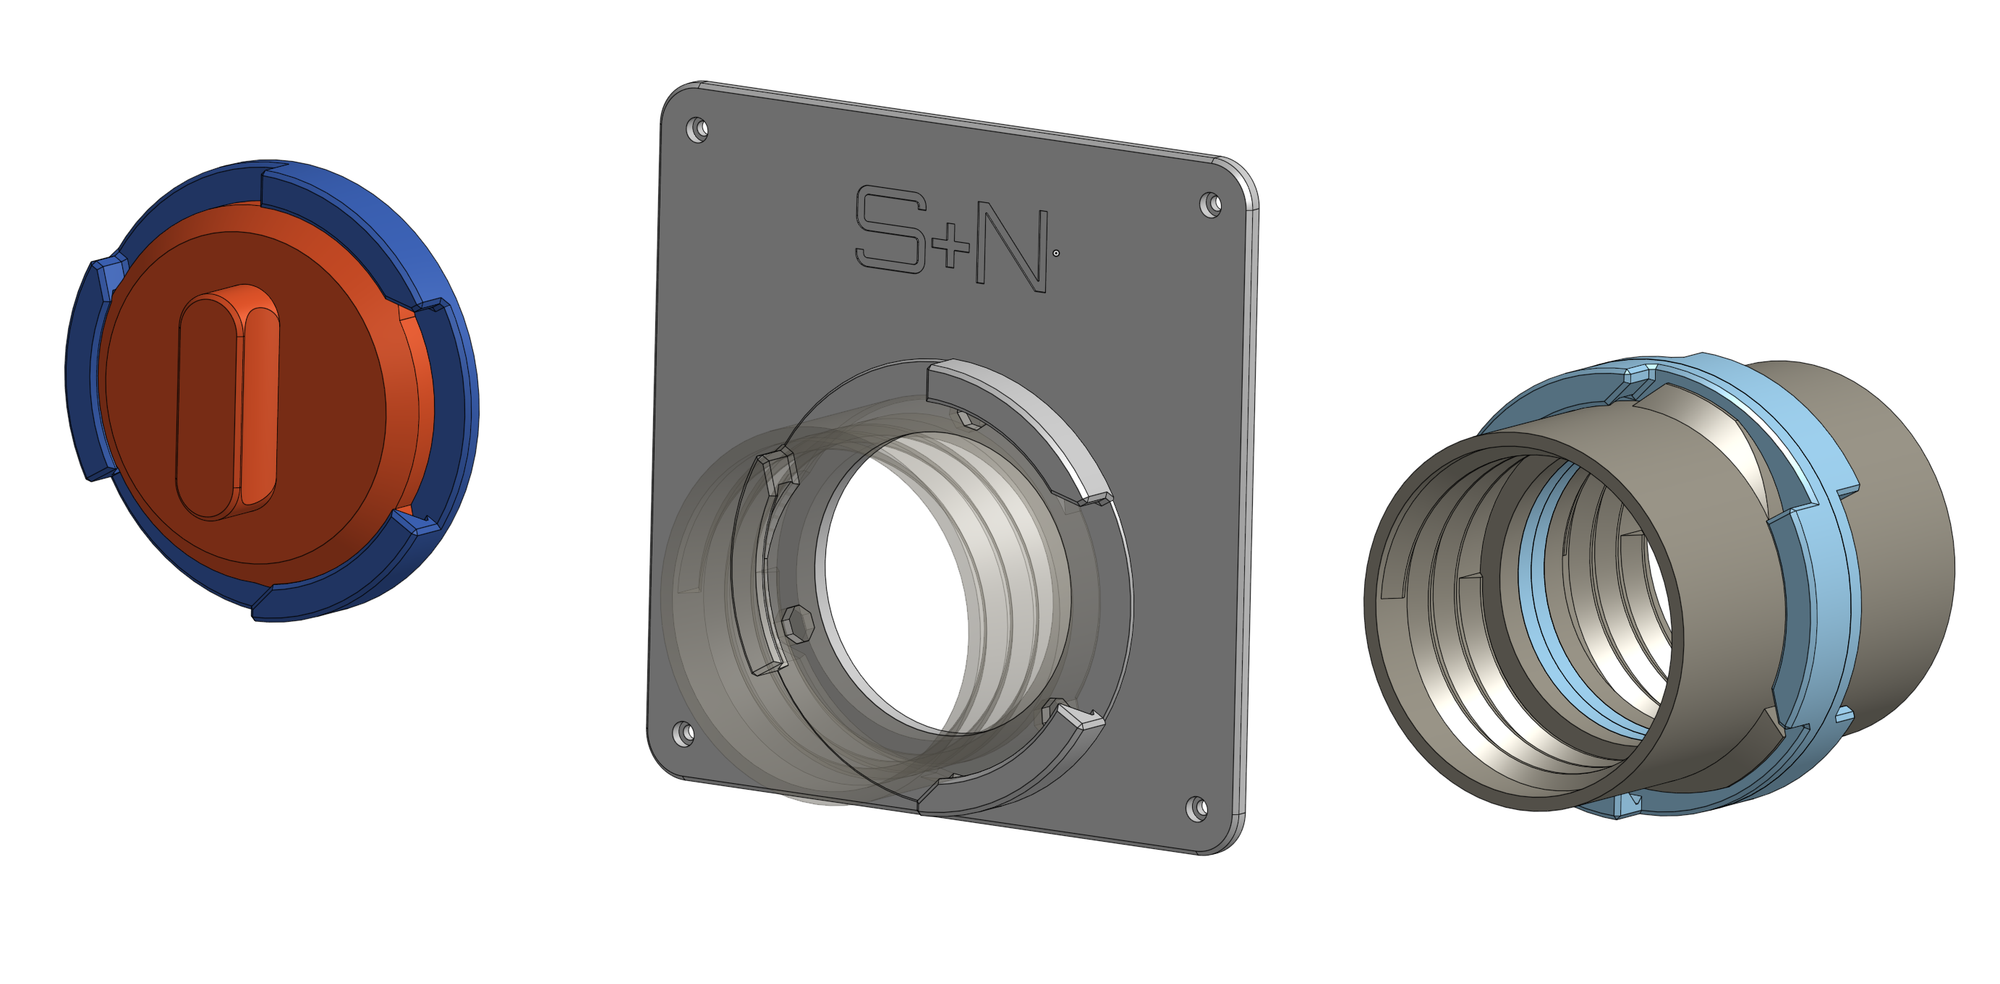
I also decided to move to only using magnets on the bolt portion of the locking connector, with the outer ring switching to FHCS screws (flat head socket cap screws) which the magnets would happily affix to and which could then be re-used to serve as the fixture screws for connecting the coupling connector segments together.
Then to secure pieces together more permanently, I opted to add an M4 screw hole into which a SHCS screw (square head socket cap screw) could be secured - preventing the lugs from rotating.

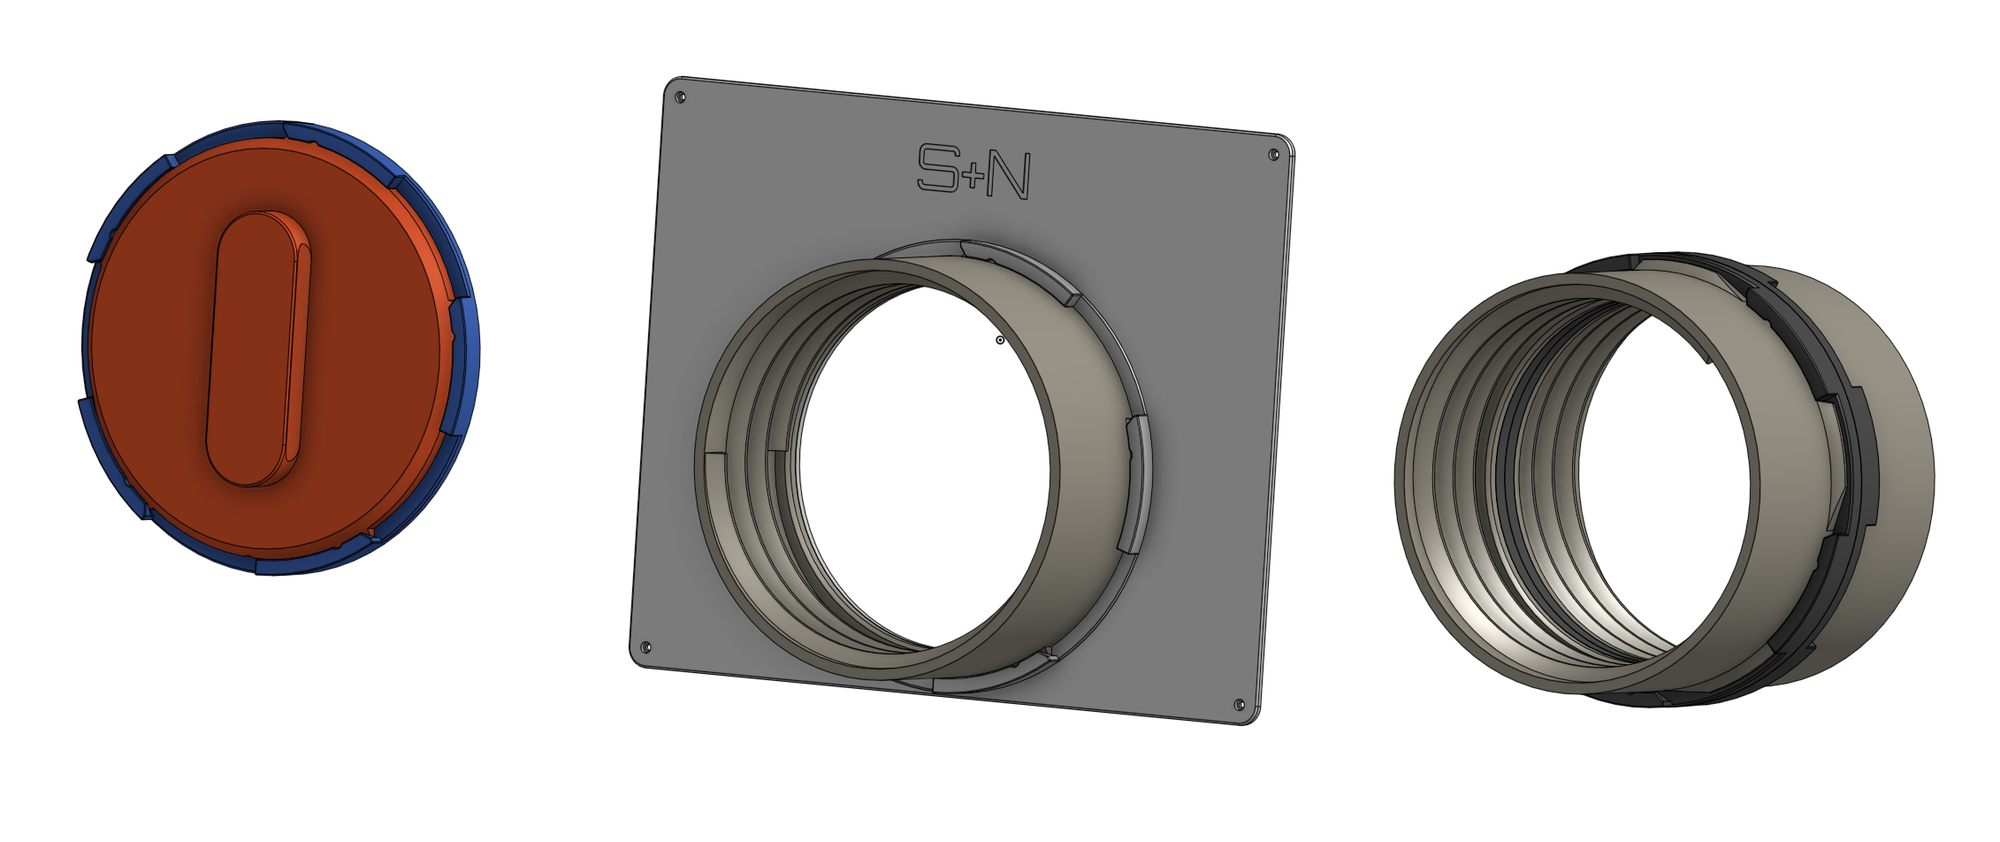
Mix in the need to reverse the thread direction for the piping I received (because it turns out the smaller-diameter pipe I prototyped with used the opposide helical direction) and a bit of outer-diameter fine tuning, and the net result is shown below!
What's Next
Okay, so Version 3 isn't perfect either. While it works reasonably well, there are several aspects I'd like to improve upon in the design and which may result in a v4 being developed.
- The 5x locking lugs result in a reasonably short throw for locking and unlocking - that's good and bad since the process of twisting the pipe to lock/unlock it risks unlocking the other end.
This could be resolved with an active spring-loaded latch to secure the locking lugs - which would do away with the need for magnets and locking hardware entirely. Ideally I'd design this to be a replaceable component, since the rest of the hardware is large enough that needing to dispose of it when a spring fails would be extremely wasteful. - Ferrous screws (which are required for the magnets to work) are also...ferrous (i.e. have a high iron content) and thus tend to rust pretty quickly. I'd love to move to stainless hardware, but can't do so as long as we use magnets to secure things to one another.
- The pipe screws into the inside of the pipe adapters, which works well enough but does mean two things: it's hard to estimate the right size to use for the inner diameter of the adapter (only the inner-diameter of the pipe is specc'ed) and it also potentially leaves a sharp steel wire sticking into the part of the run where the soft, squishy, rabbits go.
I'd like to redesign things such that the adapter screws onto the inside of the pipe - that will reduce the aperture size for the rabbits but since the pipe is more than large enough for them to turn around in, that likely isn't a major issue. - There are no ventilation holes in the pipes or connectors, which could lead to the air inside getting rather warm in summer (they're effectively miniature greenhouses).
I'd like to add some vents in strategic places to help cool things down for our furry friends - even though they don't spend significant time in the tunnels themselves.
Building it Yourself
Okay, so you want to build something like this for your own rabbits? You're going to need a few parts to get you started.
180mm PU dust extraction ducting (6m lengths available from some suppliers for reasonable prices, avoid Amazon)
8x3mm N52 magnets (5 per pipe adapter or door cover)
M3x6 FHCS screws (5 per door mount)
M3x16 FHCS screws (10 per coupling connector)
M4x8 SHCS screws (1 per pipe adapter or door cover if locking is required)
Printed Parts
You'll also need to print out the parts themselves, which can be downloaded here. Keep in mind that you'll need a rather large printer for some of these parts (especially the door, which is 355x280mm in size).
When it comes to printing these, you're going to need be be intentional with your material selection - I opted to use PETG for several reasons:
- It's non-toxic - rabbits like to chew on things and the last thing you want is them ingesting something they shouldn't. PETG minimizes the risk there (but keep in mind that if you're printing anything else on your printer then this is definitely not food-safe and if your rabbits are chewing on the plastic frequently, you may want to re-evaluate its use and/or use a brand new nozzle to print the parts).
- It is UV-stable - these runs are going to be left outdoors and the last thing we want is for the parts to become brittle and potentially break down the line.
- It has a reasonably high melting point - again, being left out in the sun during summer is going to result in these getting warm. PLA will soften and lose its structural integrity, resulting in the locking mechanism failing.
- It has very good inter-layer adhesion - since we're printing these components in an orientation which results in loads across the Z-axis, it's important that our layer adhesion is good enough to prevent failures. ABS tends to fail in these scenarios if your printing temps are too low/cooling is too high, and it would result in the locking lugs snapping off.
- It has good warping characteristics - we're printing parts up to and including 355x280mm panels, anything which can warp is going to warp at that kind of size and PETG does a great job of staying where it's meant to.
Analyzing the Cost
Ultimately the project was more costly than just buying the Omelet Zippi tunnel set, but in exchange we got almost 4x the length and if we wanted to add a further 6 meters to the already gratuitous length, it would likely cost about €250 for materials all-in. Not cheap, but also less than half the price of the equivalent length from Omelet.
I grew up writing software to solve real world problems I faced, and it played a significant role in developing my skills as a software engineer and opening the doors which have led to my current career. In many ways, 3D printing is the "I can touch it" equivalent of that - and while there are certainly less time consuming ways to solve a problem, sometimes learning how to do so yourself is worth far more in the long run.
This project taught me several key tricks which I'll incorporate into future designs, and which have already enabled me to design better models in less time. So the next time you need a 3D printed trinket to solve a problem, ask yourself whether you could design it from scratch - and give it a go!