Compensating for Nozzle Expansion in Klipper
As someone who does a lot of 3D printing, I'm consistently irritated by imperfect first layers when changing filament types on my custom printer - so I wanted to do something about it. Here's how you can do the same.

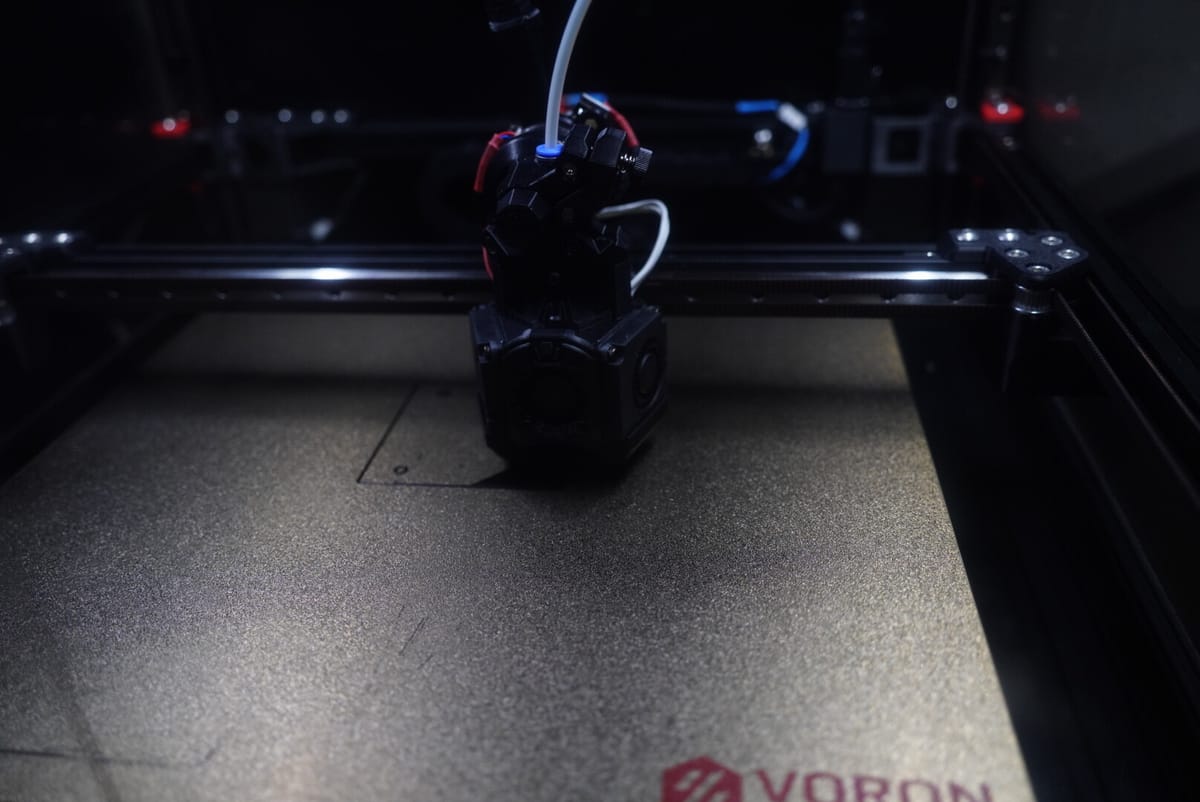
As someone who has built and operated a Voron 2.4R2 for the last few years, doing the typical Voron thing of replacing and upgrading almost every component until it scarcely resembles the original design, I've consistently been irritated by the degree to which my first layer quality is impacted by changing filament types.
More specifically, switching from a higher temperature filament like a high-speed ABS blend to something like PLA (or vice versa) will result in me needing to re-calibrate my z-offset (at print temperature). To make matters worse, calibrating with a cold nozzle would consistently result in my printer turning itself into a very expensive etch-a-sketch with my hot plate...
Switching to a high-flow nozzle extension (a fancy version of what is described in CNC Kitchen's video above) exacerbated this issue further, despite moving to Cartographer.
The problem at hand is the thermal coefficient of expansion of your nozzle (technically, your entire hotend). As you heat it, your nozzle will expand - effectively requiring you to increase your z-offset to compensate. You can avoid this by using something like VoronTAP or Cartographer Touch at your print temperature (or a fixed offset below your print temperature), but probing at high temperatures has a tendency to damage the surface of your bed and any contact probing introduces the need for a nozzle brush, which I've found mixed results with.
Instead, I wanted to be able to do entirely non-contact probing while still consistently getting perfect first layers regardless of temperature. In theory this is exactly what the [z_thermal_adjust] feature in Klipper would be perfect for, but alas it requires me to use a unique temperature sensor instaed of just pointing it at my [heater] element (which is the nozzle temperature).
Auto Z-Offset Macro
This brings me to the macro I've created to solve this problem. It works by defining a couple of temperature set points with reference z-offsets and linearly interpolating between them to determine the appropriate offset to apply for a given temperature. I invoke this as part of my PRINT_START macro and have had excellent success with it ever since.
[gcode_macro SET_Z_OFFSET_FOR_TEMP]
description: Automatically sets a z-offset to compensate for nozzle expansion
variable_z_nozzle_expansion_temp1: 150
variable_z_nozzle_expansion_temp1_offset: 0
variable_z_nozzle_expansion_temp2: 270
variable_z_nozzle_expansion_temp2_offset: 0
gcode:
    {% set temp = params.TEMP|default(printer.extruder.target)|float %}
    {% set extra_offset = params.EXTRA_OFFSET|default(0)|float %}

    {% set temp_interpolation_position = (temp - z_nozzle_expansion_temp1) / (z_nozzle_expansion_temp2 - z_nozzle_expansion_temp1) %}
    {% set z_offset = (z_nozzle_expansion_temp2_offset - z_nozzle_expansion_temp1_offset) * temp_interpolation_position + z_nozzle_expansion_temp1_offset %}

    {% if temp < z_nozzle_expansion_temp1 %}
        {% set z_offset = z_nozzle_expansion_temp1_offset %}
    {% elif temp > z_nozzle_expansion_temp2 %}
        {% set z_offset = z_nozzle_expansion_temp2_offset %}
    {% endif %}

    M117 "Adjusting Z Offset to {z_offset}mm for temperature {temp}C"
    SET_GCODE_OFFSET Z={z_offset} MOVE=1
A Klipper gcode macro which automatically computes a z-offset based on target temperature
This is then added to your PRINT_START macro after you set M104 S{extruder_temp} or M109 S{extruder_temp} and will print the z-offset adjustment it makes to the terminal.
Calibrating the Macro
You'll notice that the macro has a number of variables defined at the top of the macro itself - these need to be configured for your printer by following a one-time calibration sequence (unless you change your hotend/nozzle).
First, you'll need to home your printer using G28 and set your nozzle temperature to your probing temperature. If you're using VoronTAP/Cartographer Touch/Beacon Contact then this is probably something like 150°C - set that with M104 S150 or through your printer's UI.
Move the toolhead to the center of your bed with a Z-height of about 5mm (you can use something like G0 X175 Y175 Z5 F1200 to do this on a 350x350mm printer).
Once the nozzle is at temperature and has had a chance to settle (give it a minute), you'll want to start the process of calibrating your Z-offset. This is usually done by running PROBE_CALIBRATE (or if you're using Cartographer - CARTOGRAPHER_CALIBRATE METHOD=manual) and following the usual process.
We want to get the nozzle to the point where it scrapes along a piece of paper such that the following is true:
- You need to apply some force to move the paper, but it is not at risk of tearing.
- You can re-insert the paper under the nozzle without raising it again.
- Moving the toolhead down 0.1mm prevents you from re-inserting the paper, or moving it if the paper is already under the nozzle (remember to raise it 0.1mm again after checking this).
This is the point where the nozzle is 0.1mm above the bed surface. You're trying to calibrate the exact point of the bed surface - so the right thing to do here is to drop the nozzle another 0.1mm after removing the paper, but I find that lowering it 0.075mm tends to give better initial results in many cases - it's usually safer to be too high than it is to be too low.
Don't worry about it not being perfectly precise - we're going to need to tune this anyway based on the bed material, slicer settings, and more - so this is just a way to get a consistent hardware calibration.
I would suggest using the same grade of paper every time you perform this calibration, switching grades is likely to result in suboptimal results.
Once that's done, accept the new Z-offset and raise your nozzle back to ~5mm above the bed using G0 Z5.
temp1 with an offset of 0.Klipper will prompt you to save your configuration by running SAVE_CONFIG and now's a great time to do that, which will cause your printer to restart. Repeat the process of homing and centering your toolhead as we did above (using G28 and G0 X175 Y175 Z5 F1200).
Now we're going to increase the nozzle temperature to our second set-point (the highest temperature you plan to print with, or the maximum temperature your hotend is configured to allow, your choice). In my case this involves running M109 S280 to set the temperature to 280°C and wait for it to heat up.
With the nozzle heated, we're now going to lower the toolhead back down toward the bed until it is almost touching, then we're going to grab our sheet of paper and slide it under the nozzle, lowering it in 0.1mm steps until it starts to scrape the paper gently. You'll likely find that this occurs at about 0.1mm, so let's add that to our Z-offset using your printer UI or by sending SET_GCODE_OFFSET Z=0.1 MOVE=1 (if you find that it starts to scrape at 0.2mm then substitute Z=0.2 in the command, you get the idea).
You should now be able to lower your toolhead such that the requested Z level is 0mm and you're barely scraping the paper (by running G0 Z0). We're now going to slowly adjust our z-offset until we get the same 0.1mm gap we were looking for when calibrating our z-offset at our probing temperature - except this time we're not going to do the final lowering of the toolhead (to protect our bed surface).
Instead, we're going to take our current Z-offset (which is probably something like 0.144mm) and subtract our same 0.075mm from that to compensate for the thickness of the paper - giving us a number of 0.069mm. This becomes the offset for our second temperature set-point.
temp2 set-point. The equation we're using is simply temp2_offset = z_offset - 0.075.TURN_OFF_HEATERS and G0 Z10 to move our toolhead away from the bed surface - we don't want to risk damaging anything.Now we're going to clear our Z-offset (so make sure you've taken note of the number we calculated above) by running SET_GCODE_OFFSET Z=0 MOVE=1 and go to update our macro configuration variables to match what we measured above.
[gcode_macro SET_Z_OFFSET_FOR_TEMP]
variable_z_nozzle_expansion_temp1: 150
variable_z_nozzle_expansion_temp1_offset: 0
variable_z_nozzle_expansion_temp2: 280
variable_z_nozzle_expansion_temp2_offset: 0.069
...
A partially updated version of the GCode macro shown earlier, reflecting the new variable values.
Once you've updated these values and saved your printer.cfg file, reload your config using RESTART and we're then going to do a validation pass.
Validating your Configuration
The validation process is very similar to the calibration process, so we're going to run through it reasonably quickly.
First, home your printer and move the toolhead to the middle of the bed using G28 and G0 X175 Y175 Z10 F1200 (with the appropriate X and Y values for your printer).
Next set your hotend to temp1 using M109 S150 (assuming that you've entered 150°C as your first temperature set-point).
Now we're going to run SET_Z_OFFSET_FOR_TEMP and confirm that it prints the following to our terminal:
Adjusting Z Offset to 0mm for temperature 150C
This indicates that we haven't had to make an adjustment for the current temperature (which is great, since that's what we intended).
Now we're going to move your toolhead down to 1mm above the bed, and then incrementally lower it until it's 0.1mm above the bed surface, confirming that it rubs well against the paper. Then lower the toolhead to 0mm above the bed surface using G0 Z0 and confirm that the paper will not fit under the nozzle.
temp1 set point is correctly configured and calibrated.Now we're going to raise the toolhead again, and increase the temperature to somewhere in the middle of our range using G0 Z10 and M109 S230 (where I'm assuming that 230°C is about the mid-point between your temp1 and temp2 set-points).
Now we're going to run SET_Z_OFFSET_FOR_TEMP again and confirm that it prints the following to our terminal (note that the offset should be non-zero and positive):
Adjusting Z Offset to 0.032mm for temperature 230C
Once your nozzle temperature has stabilized, we're going to repeat the check - lowering the nozzle until it is at 0.1mm and confirming that is gently scrapes the paper.
temp1 and temp2 set points and offsets are correctly configured and calibrated, as the nozzle's z-offset has been dynamically adjusted to compensate for the nozzle's thermal expansion.With that, let's check-off our safety work by getting the printer back to a safe state.
TURN_OFF_HEATERS and G0 Z10 to move our toolhead away from the bed surface - we don't want to risk damaging anything. We can also reset our Z-offset by running SET_GCODE_OFFSET Z=0 MOVE=1 to remove the prompt to save your config.Congratulations, you've now successfully calibrated your nozzle expansion compensation macro and should be good to go!
SET_Z_OFFSET_FOR_TEMP to your PRINT_START macro AFTER you have set the hotend temperature otherwise the nozzle expansion compensation will not be applied and you're likely to have the nozzle expand enough to cause it to strike your bed (which you most assuredly do not want it to do).A note on first layer calibration
For all that this process sounds rigorous and scientific, there are a wide range of variables which influence your first layer which we are not measuring or controlling for here. While it should get you into the rough ballpark, I can almost guarantee that first-time users are going to have imperfect first layers after doing so.
By following this process consistently and methodically, you're going to reduce the amount of work you need to do on subsequent calibrations - if you do decide to go off-script (using a different adjustment amount after checking the paper, or using a different type of paper) write that down and repeat it next time.
Which brings us to how you actually get a perfect first layer (assuming everything else remains constant and your printer is well built): print something and adjust it.
We've confirmed that, at printing temperatures, your nozzle doesn't contact the bed - so barring something horrible happening, you probably won't end up engraving your first layer outline into the bed's surface - but be ready to hit the 🚨Emergency Stop at the first sign of trouble on your first print.
What should happen is that your printer will start laying down a first layer - and the things we're looking for to tell us that it's going well (and how to adjust it). We want the lines to overlap smoothly - resulting in a consistent surface finish approximating what you'd expect from a clean top-layer (i.e. it should not have visible gaps/waves in the surface, or have thin ridgelines).
If you're seeing waviness or colour inconsistencies then that is likely a sign that your Z-offset is too high (in extreme cases you'll be able to see the filament above the bed surface - but if you followed the calibration correctly then that's unlikely).
Conversely, if you're seeing a very rough surface with what appear to be fine ridge-lines and no gaps between the extrusions, then your nozzle is likely pushing down too far and causing plastic to be forced upwards, requiring you to raise your Z-offset.
In general, I like to adjust the z-offset in 0.025mm increments until I get a uniform surface finish, and then confirm by looking at the underside of the print to ensure that there are no strongly visible lines between extrusions.
SAVE_CONFIG and be done with it - but because we've dynamically set a starting z-offset, you're going to need to do a bit more work.Start by checking what the dynamically configured Z-offset was (it'll have been printed to your terminal like "Adjusting Z Offset to 0.032mm for temperature 230C").
Then calculate how much you actually need to adjust your z-offset by subtracting the original from your new offset. If your original dynamic z-offset (as shown above) was 0.032mm and you're now using 0.007mm then we'd calculate
0.007 - 0.032 and get -0.025mm as the difference.Once your print has completed, run
SET_GCODE_OFFSET Z=-0.025 MOVE=1 to set your offset to the amount you needed to adjust by and then run SAVE_CONFIG to store the adjustment permanently.